How to Set up the L2TP VPN connection on Windows 8
Step 1. Open Network Connections.
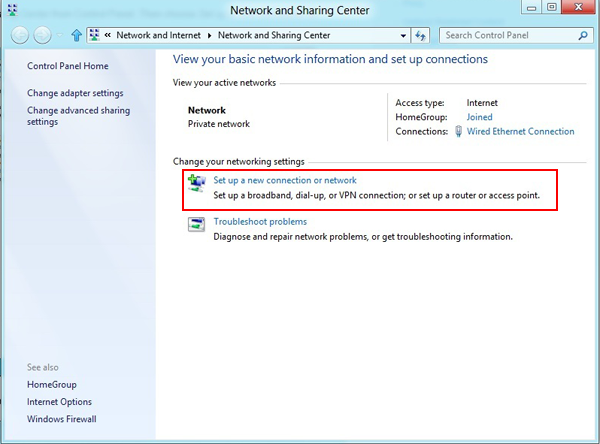
First, Open Network and Sharing Center from Control Panel. Then choose Set up a new connection or network.
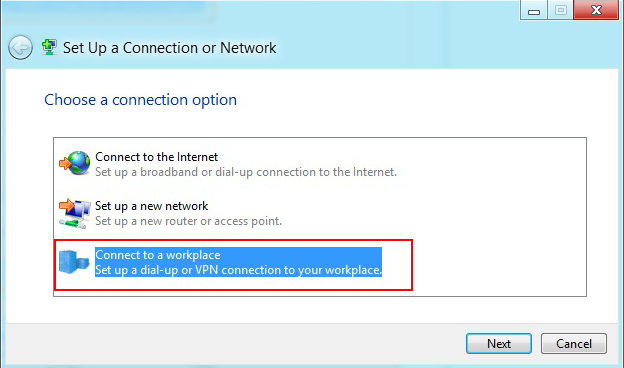
Step 2. In the next window, choose: Connect to a workplace and click Next.
Step 3. In the next window, choose Use my Internet Connection (VPN).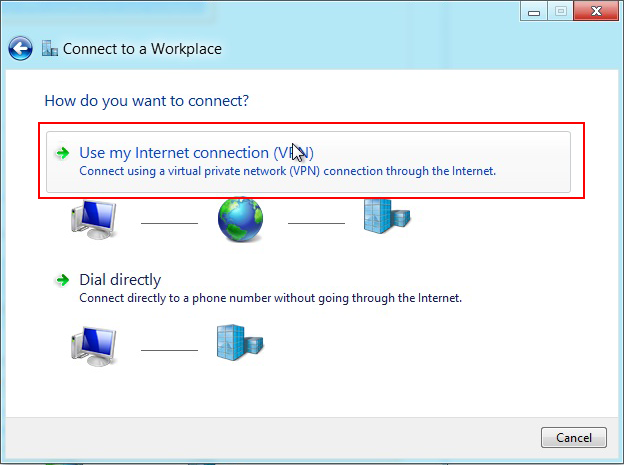
Step 4. Under Internet address type the name or IP address of the WideVPN server you want to connect to. Check the email you have received when you have paid for the WideVPN account. You can also check the list of IP addresses under My Servers in member area
Step 5. Then enter WideVPN VPN L2TP as the name of the connection in the Destination name box (you can name it as you want). Then click Create.
Step 6. From Network and Sharing Center select Change adapter settings from the left page.

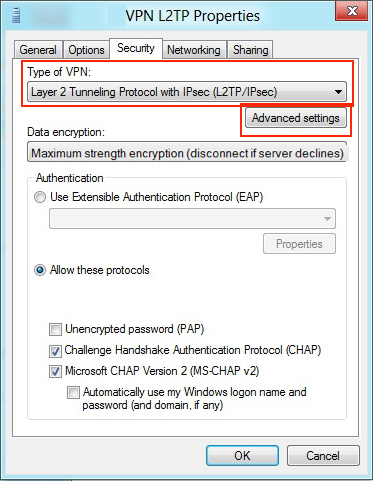
Step 7. Under Security Tab for Type of VPN select "Layer 2 Tunneling Protocol with IPsec (L2TP/IPsec)" and check "Allow these protocols" then check "Microsoft CHAP Version 2 (MS-CHAP v2)and Challenge Handshake Authentication Protocol (CHAP). Also check Maxmimum strenght encryption encryption (disconnect if server declines) for Data encryption.
Step 8. Now, click on "Advanced settings". Here you will have to check "Use preshared key for authentication" and is as following:
widevpn
Now click "OK".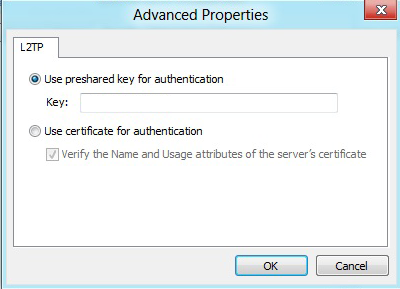
Step 10. Almost done, Click again on the monitor icon on the bottom right-hand corner, find widevpn (L2TP) connection and click connect.
Type your VPN username and VPN password (both available in the "member area") and click OK.
Step 11. Done, your Windows 8 now should be connected to the VPN server via L2TP protocol.