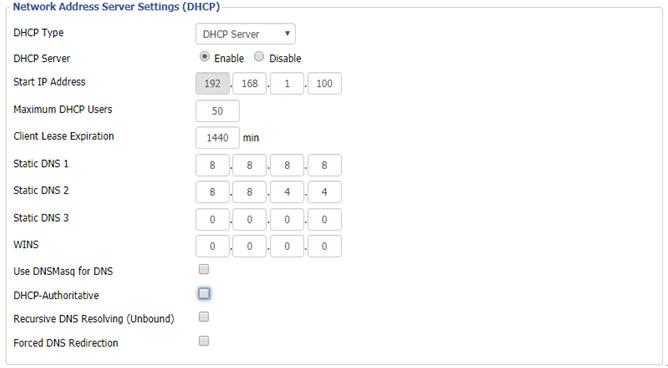
Direct your browser to the DD-WRT router. The default address is "http://192.168.1.1", unless changed earlier). Select "Setup" tab, then "Basic Setup" sub-tab and scroll down the page.

Set static DNS to 8.8.8.8 and 8.8.4.4, uncheck Use DNSMasq for DHCP, Use DNSMasq for DNS, DHCP-Authoritative and Forced DNS Redirection.

Now scroll down to "Time Settings" and click to Enable "NTP Client". Set your preferred time zone and change the "Server IP/Name" to 1.pool.ntp.org. Now click "Save" and "Apply Settings" to effect the changes made.
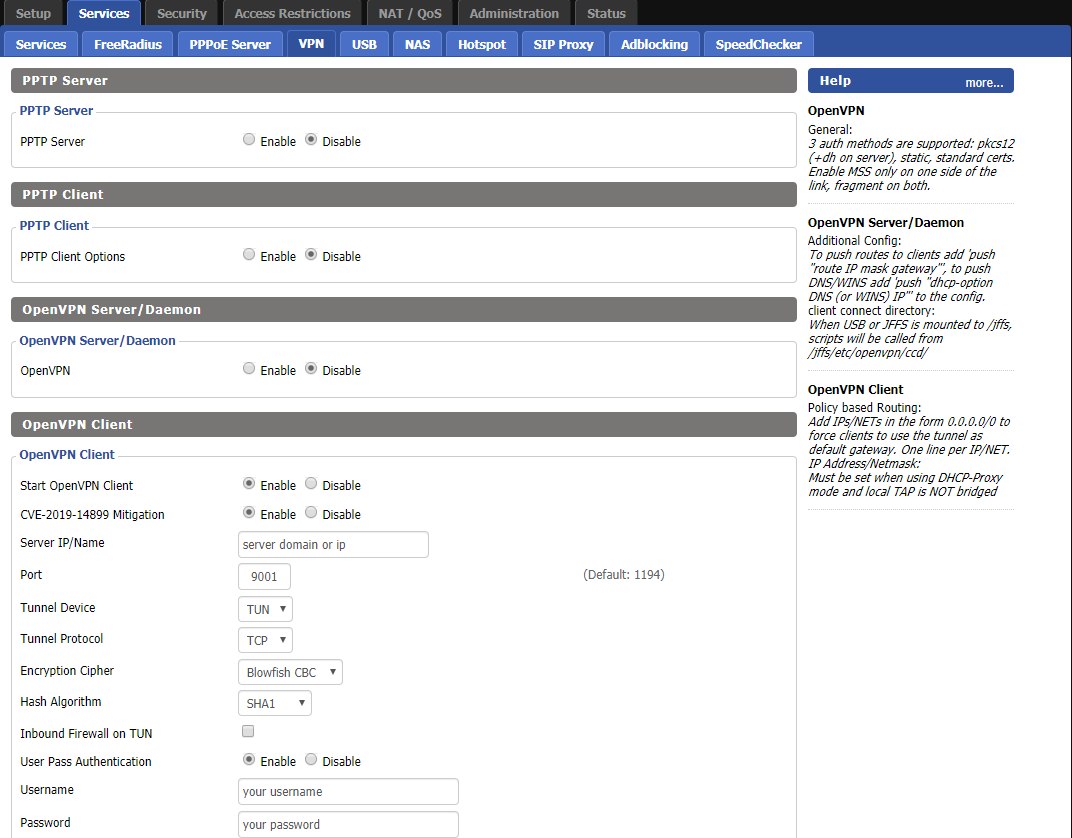
Now access Services tab and select the VPN sub-tab. Enable Start OpenVPN Client below OpenVPN Client section and enter the details as given below:

•Start OpenVPN Client: click to enable.
•Server name: check server list at member center - node List
•Port: 9001
•Tunnel Device: TUN
•Tunnel Protocol: TCP
•Encryption Cipher: AES 256 GCM
•Hash Algorithm: SHA1
•Inbound Firewall on TUN:uncheck
•User Pass Authentication: Enable
•Username: your username (sign up widevpn)
•Password: your password (sign up widevpn)
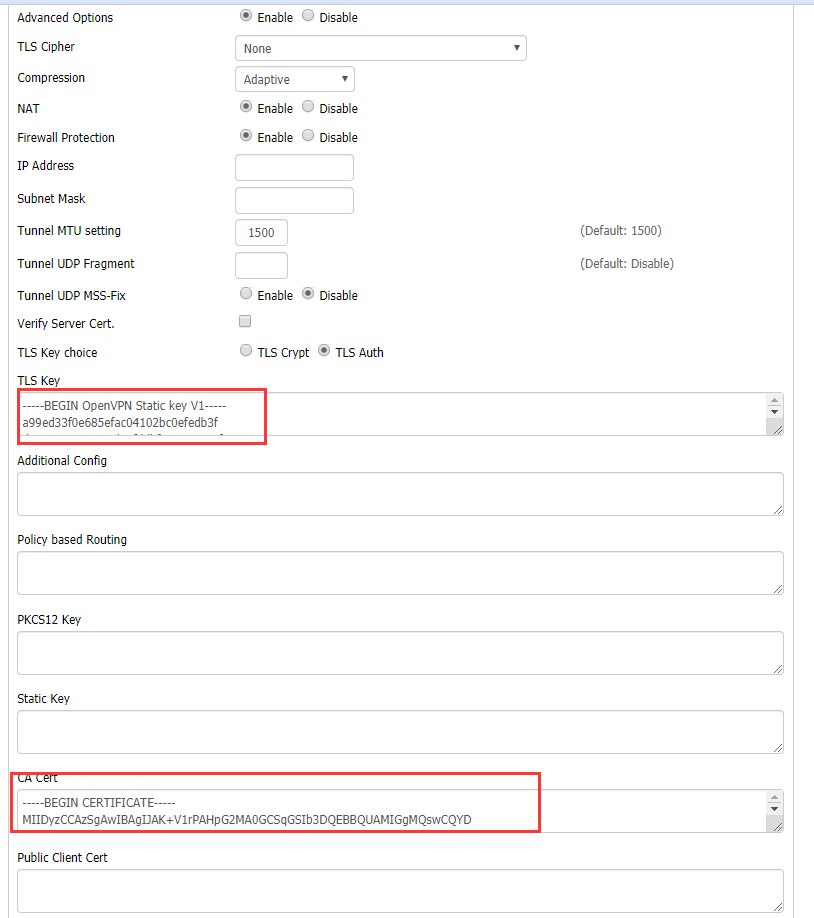
•Advanced options: Enable
•TLS Cipher: none
•LZO Compression: adaptive
•NAT: Enable
•Firewall Protection: Select disable
•IP Address: Leave as blank
•Subnet Mask: Leave as blank
•Tunnel MTU Setting: 1500
•Tunnel UDP Fragment: Leave as blank
•Tunnel UDP MSS-Fix: Disable
•Verify Server Cert.: uncheck
•TLS Key choice: TLS Auth
•TLS Auth Key: Copy from the content beginning with <tls-auth> </tls-auth> from the .ovpn configuration file
•CA certificate: Paste in keys between <ca></ca> tags on the .ovpn file obtained at member center
Click "Save" and "Apply Settings" to save the setup.

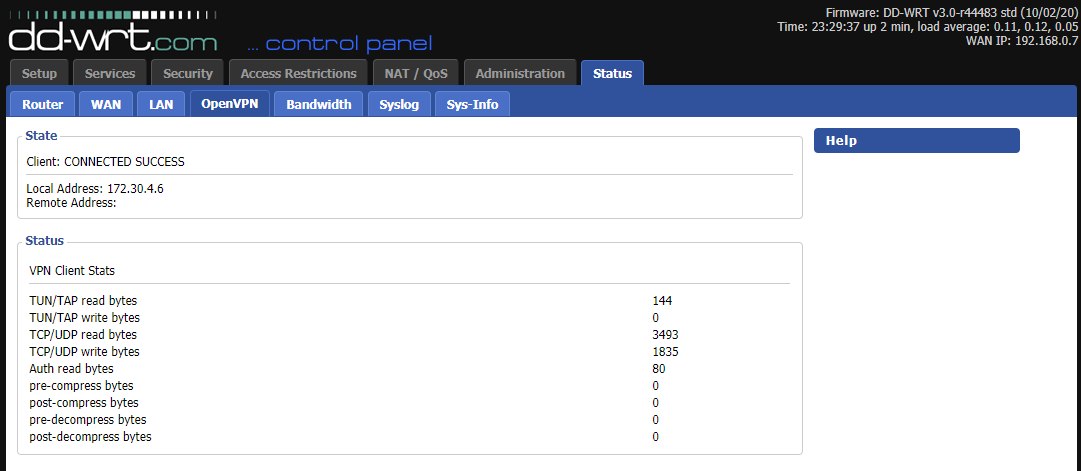
Select the “Status” tab and click on the “OpenVPN” sub-tab. You can view the status and log for your WideVPN connection here.
