WideVPN WireGuard Setup for MacOS
Download the WireGuard app
Currently, the WireGuard app requires macOS version 10.14 or newer.

Open the macOS App Store and find the WireGuard app.
Click Get/Install to download and install the app.
Start the WireGuard app from your computer's Launchpad or Application folder. The WireGuard icon will display in your desktop's top menu bar (no window will automatically open).
Generate and import configuration file
In member center, navigate to our WireGuard configuration generator.
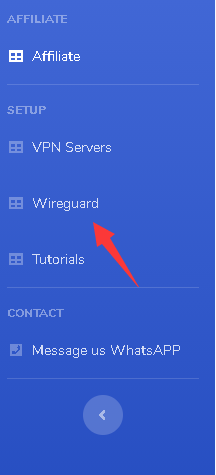
Scroll down at the configuration generator page and select your preferred location. Then click on the GENERATE button.

The configuration file will be saved to the Downloads folder as default or to your preferred location.
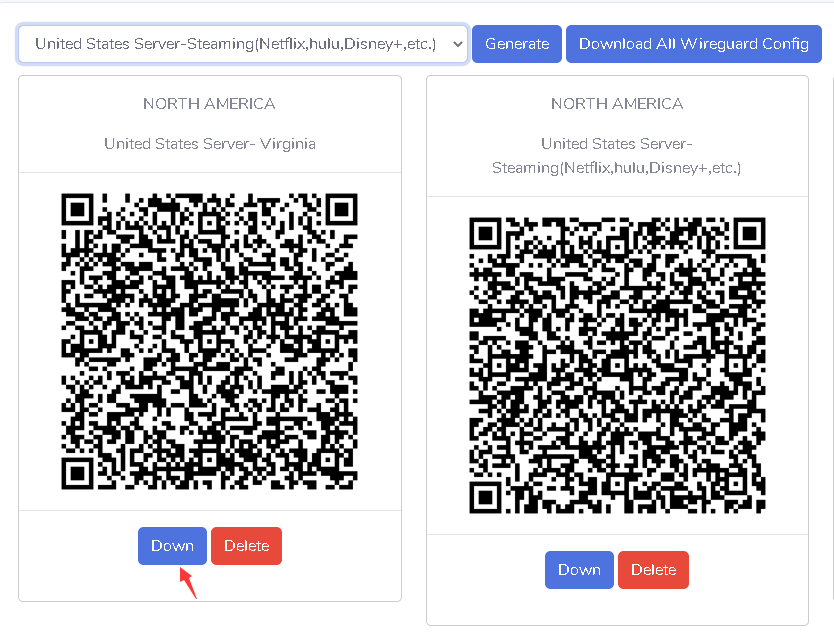
Generate a separate key pair for each device that you use. Click Download to save the file. You may need to wait a few seconds for the file to begin downloading.
The config file will be saved in the Downloads folder or you can save it at a preferred location. You can rename it something more recognizable if you want.
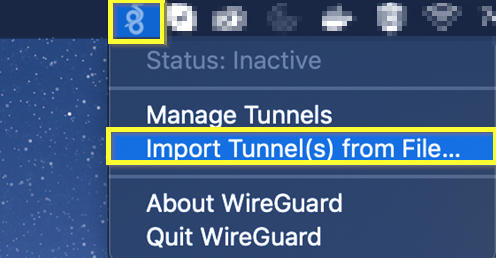
Go to the WireGuard menu on the top right corner and click "Import tunnel(s) from File".
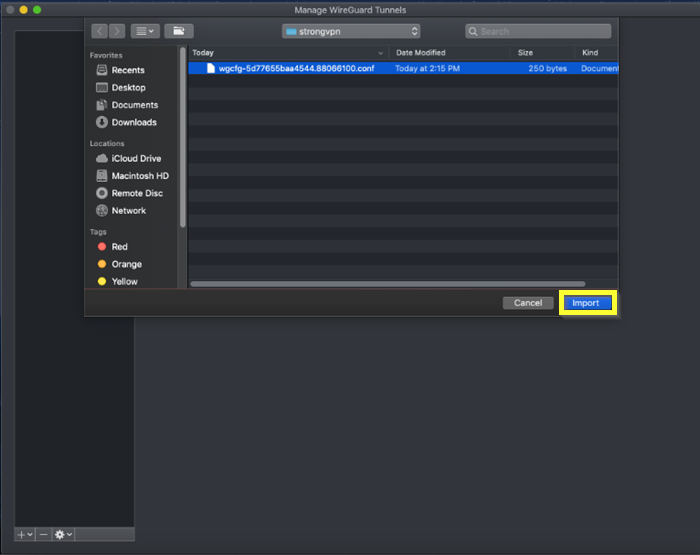
Select the downloaded config file from the saved location and click on the Import button as shown below.
Click on the Allow button to add StrongVPN WireGuard on your MacOS device.

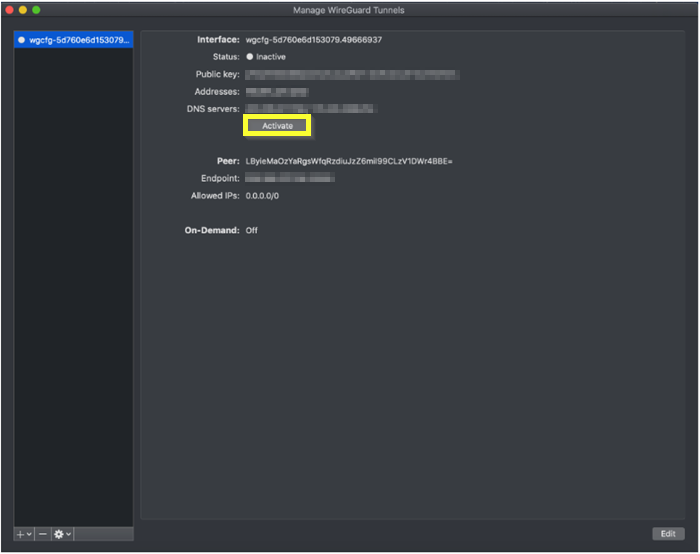
Your imported connection will be ready at the WireGuard menu. Click on the Activate button to activate the VPN.
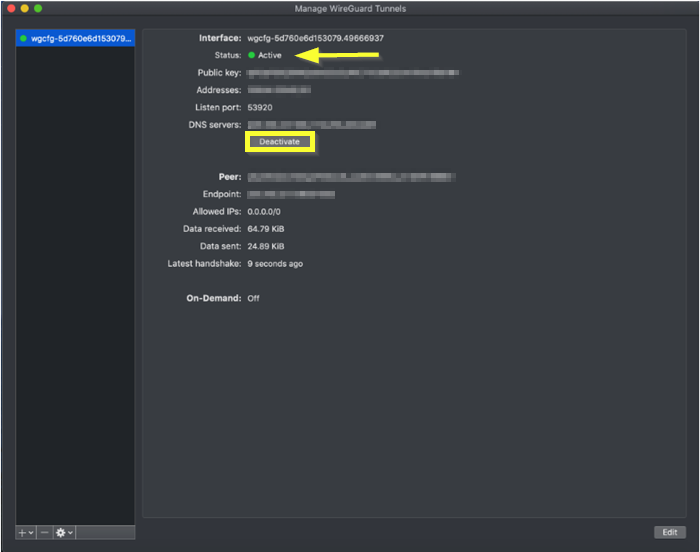
Click on the WireGuard icon located in your desktop's top menu bar.In the drop-down menu, click on the server that you're connected to (the one with a checkmark next to it).The checkmark will disappear, signaling that you are disconnected.
Using multiple devices?
If you're running WireGuard on multiple devices, generate a separate key pair for each device. You will otherwise likely run into connectivity issues.