How to Set Up A PPTP VPN Connection in Windows 7
VPN stands for Virtual Private Network, a network that connects one or more computers to a large network, such as a business network, using the Internet. A VPN is encrypted and safe, so it’s widely adopted by many of businesses. VPN is a pretty complicate network protocol that we are not going to discuss more deep in here. What I cover in this post is a simple how-to that simply shows the steps to set up a VPN connection in Windows 7.
First of all, please note that this how-to uses the built-in network setup right in Windows 7, so it works the best if VPN server on the other side is also from Windows Server.
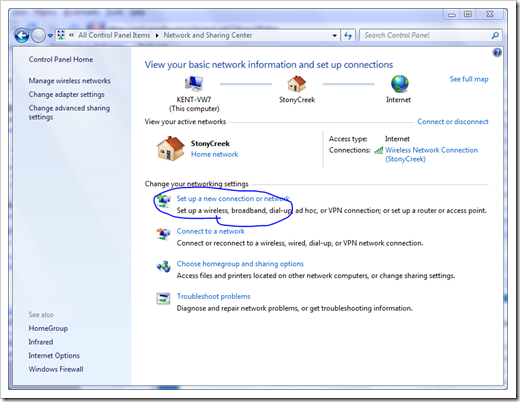
Open up network and sharing center from Control Panel, and choose Set up a new connection or network.

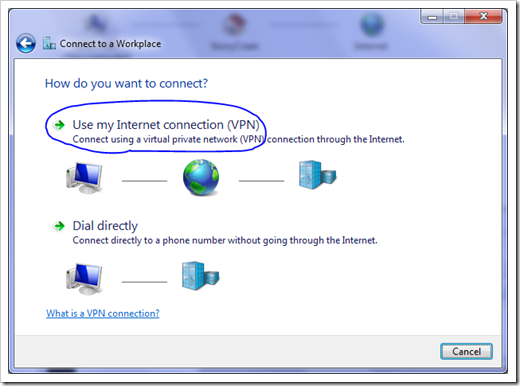
There are two options in the Connect to a Workplace window. 99% of the time you just need to pick the first option, unless your company only allows you to dial in using a phone line.

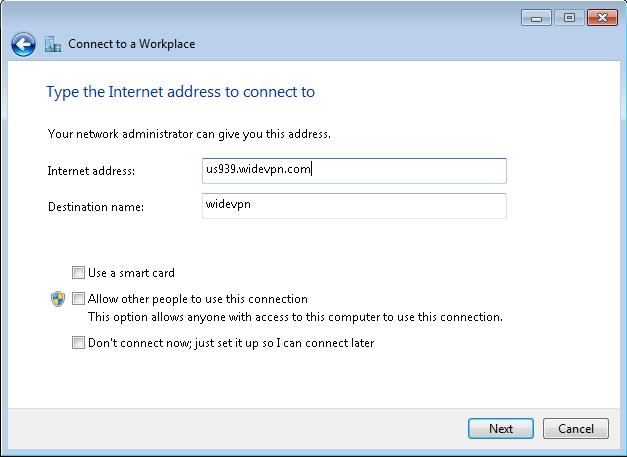
Type in the address in either domain name or IP address, and name the connection in the destination name box. And click Next.

You can leave all user login info blank if you feel safe that way in the next window. And clickCreate. You’re all set if you see the next window as below.

To launch it, simply click the small network icon on the system tray at the bottom right corner, and pick the connection we just created from the popup list, and connect.

Type in your user name and password, and you are on your way connecting your Windows 7 to your company network.
Hope it helps, and enjoy.