How to fix VPN error 809 on Windows 7/8/10
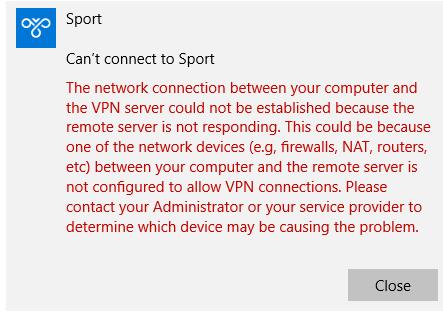
Some of the symptoms of VPN error 809 include the error message you receive, and if you’re using the L2TP protocol, you cannot connect so the error is displayed saying, “The network connection between your computer and the VPN server could not be established.”
In order to fix “Error 809” on Windows, you will need to edit the Windows registry. In order to do so, please follow these steps:If you get VPN error 809 when trying to establish your VPN connection, and your MX is located behind a NAT, the solution to this is to add the AssumeUDPEncapsulationContextOnSendRule” DWORD value to the Windows registry.

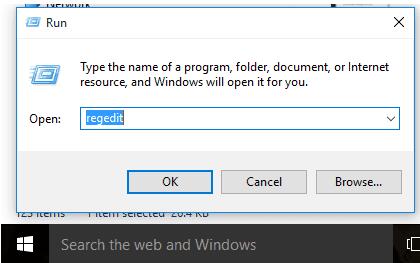
Type regedit and press enter


Make sure to login to your computer with administrator privileges.
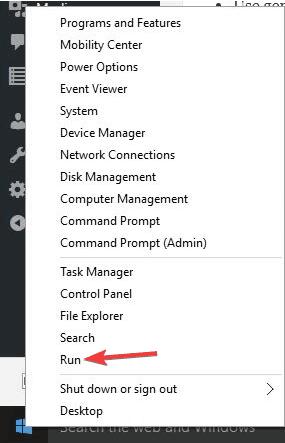
Click the “Start” button or the Windows logo at the bottom left of your screen. Now you will either see a “Run” button or a “Type to Search” input box. Either way type in “regedit” and press enter.
Loca the following key: “HKEY_LOCAL_MACHINE\SYSTEM\CurrentControlSet\Services\PolicyAgent”.
Right-click and create a new DWORD value (32-bit).
Type: “AssumeUDPEncapsulationContextOnSendRule” and click save.
Now modify the new entry and change the value data from “0” to “2”.
Lastly, reboot your computer and try connecting to snugvpn.
After the machine has been re-booted, connect to the VPN: Click on the wireless/network icon in your system tray, select the new VPN entry, and click Connect. If prompted, enter Your VPN Username and Password, then click OK.
1 Month Plan
$4.99
Support iOS, Android, macOS, Windows
Enterprise-grade security
Double VPN
VPN and Wireguard protocols
2-Multi login on multiple devices
Unlimited Data Transfer
2 Years Plan
$19.99
Support iOS, Android, macOS, Windows
Enterprise-grade security
Double VPN
VPN and Wireguard protocols
2-Multi login on multiple devices
Unlimited Data Transfer
1 Year Plan
$14.99
Support iOS, Android, macOS, Windows
Enterprise-grade security
Double VPN
VPN and Wireguard protocols
2-Multi login on multiple devices
Unlimited Data Transfer